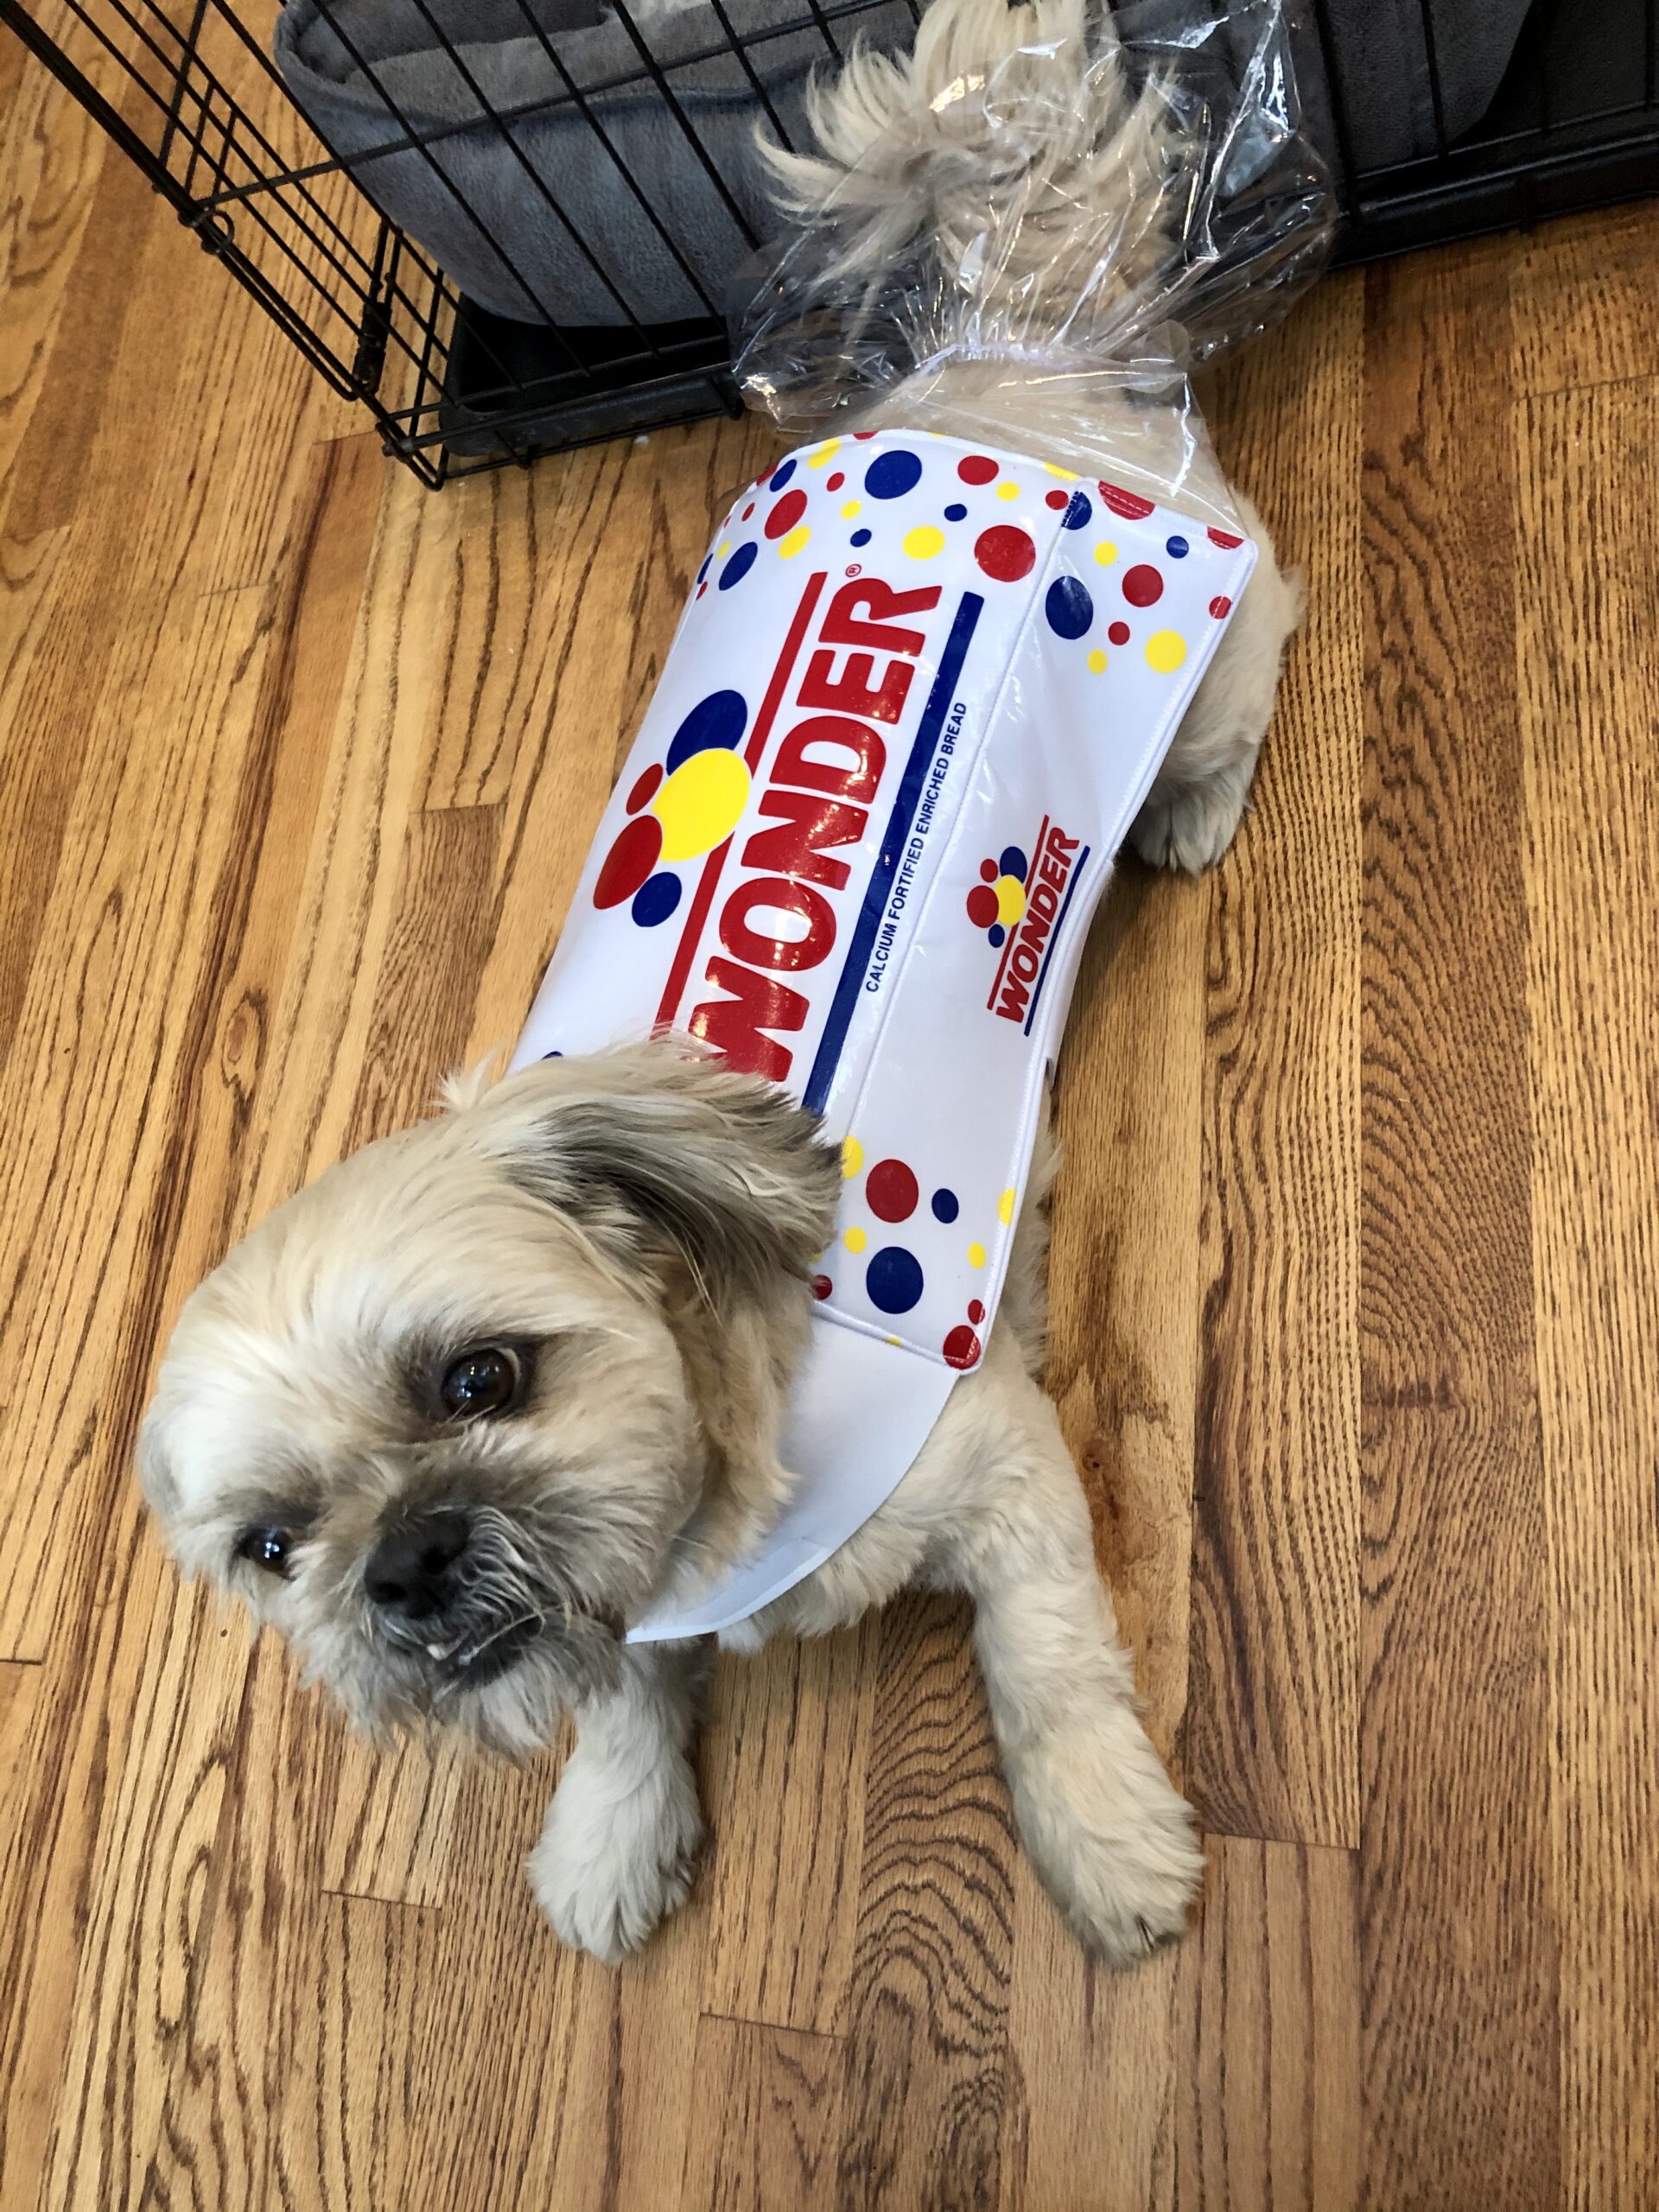
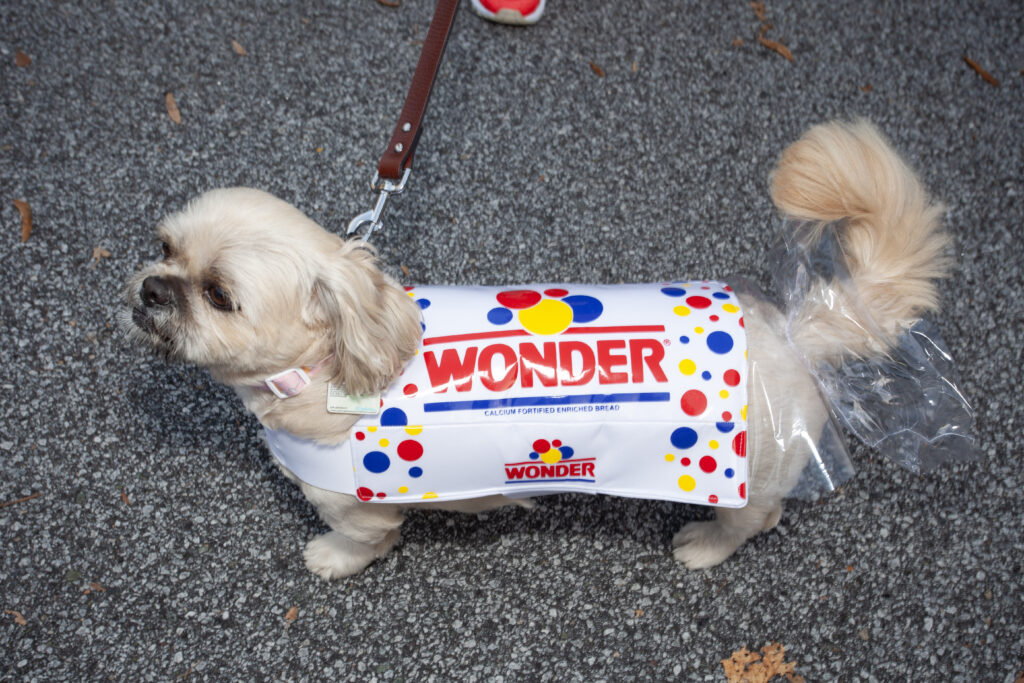
Why is our dog a loaf of bread for Halloween? Her name is Muffin and she adores naps and just to loaf around the house. She can flop down for naps anywhere: on top of shoes, on our end table, on the stairs… she just loafs where she pleases! She loafs around so much that we call her “Muffin Loaf”. Naturally, a loaf of bread is a perfect costume for her and Wonder bread brand is the most iconic!
My goal was to have her tail as the plastic “tie end”. I thought about using nylon fabric for the dots and logos so I tested this fabric with “steam-a-seam” iron-on web backing but heat transfer vinyl looked neater and was smoother and flatter on the neoprene.
Materials:
- 1 yard of 1.5mm Neoprene Scuba Stretch Fabric in White from Fabric.com or Amazon. This was the perfect weight to add structure and the Heat Transfer Vinyl logos and dots adhered beautifully to this fabric.
- Red, yellow and blue Heat Transfer Vinyl. I used the Cricut “playground” pack from Amazon and the colors were perfect. Need at least 2-3 sheets of each color.
- Pellon Vinyl Fuse to overlay over the neoprene fabric to create a shiny/plastic look. This was very easy to iron and looks fantastic over the viny/neoprene.
- 1/2 yard of clear plastic fabric from Joanns.com or Amazon. I used the thinnest clear plastic that I could find.
- Velcro tape for the straps.
- A Teflon foot for your sewing machine or tissue paper to help sew the clear plastic vinyl smoothly. This special foot helps the plastic to not stick to the machine while sewing. You can also use tissue paper on the top and bottom of the plastic to help guide the fabric and then tear away after sewing.
- Fishing line to gather plastic fabric. I use clear 30 or 40lb weight monofilament fishing line from Amazon.
- [optional] Cording or beading Foot. This is my favorite sewing machine foot for gathering fabrics. Be sure to get the correct foot for your machine.
Construction Steps:
- Create a mockup for fit. My goal was to have her tail as the plastic “tie end” but I needed to know exactly where her tail would start. I roughly measured Muffin’s back and sides to create a rectangle shape. I created a mockup using scrap fabric and used a sharpie to draw where the straps and tail plastic would go. The basic pattern shape is a rectangle with straps around the neck, under the belly and a triangle piece for the tail.
- Create the gathered plastic tail. This was the most difficult part. I transferred my mockup circle markings to the clear plastic vinyl. I used scissors to cut and “X” inside the circle right up to the marking. I cut an 8in tall by the width of fabric strip (the longer the strip, the more full your plastic tail will be). I gathered the long end of the strip using my handy dandy gathering method using fishing line and a cording/beading foot. Click to see my tutorial on gathering fabrics to fit a specific length. Once I have my plastic gathered, I move the fabric along the fishing line to fit the circumference of the hole. I then used sewing clips to hold the plastics right sides together and sew along my original marking. I then trimmed the inside of the circle and the seam allowance. The plastic cuts easily with scissors to trim down the tail. as needed.
- Adding the logos to the neoprene fabric base. The logos were digitized in my free Silhouette software. Click here to download the .studio file of the logo and the dots (this design is already mirrored for heat transfers). You may need to resize it to your needs. I cut the three colors of heat transfer vinyl on my silhouette machine using the suggested cut settings. After weeding the image of unused material, I ironed on the colors one at a time using the synthetic setting of my iron. It required heavy pressure and multiple passes to get a good adhesion before removing the clear protective layer.
- Add fusible plastic layer. Once the design was ironed down, I ironed a sheet of fusible plastic on top of the design to give it that plastic look.
- Sew the layers. The basic pattern is a rectangle with two seams to make the sides. I folded the sides inward and sewed a 1/4 inch seam on the inside crease to make the sides of the loaf. I also lined mine with another layer of neoprene to make it extra puffy but this is not necessary since the edges of the neoprene don’t fray when cut with scissors. You can also sew bias binding around the edges if you are concerned about sharp plastic edges. I sewed the straps to the edges of the outer fabric and tucked them towards the center before I sewed the lining on top with right sides together. I left a 3-inch hole in the stitching so I could turn the costume right side out. Once turned, stitch up the hole. I also topstitched around the top layer.
- Sew the velcro to the straps.
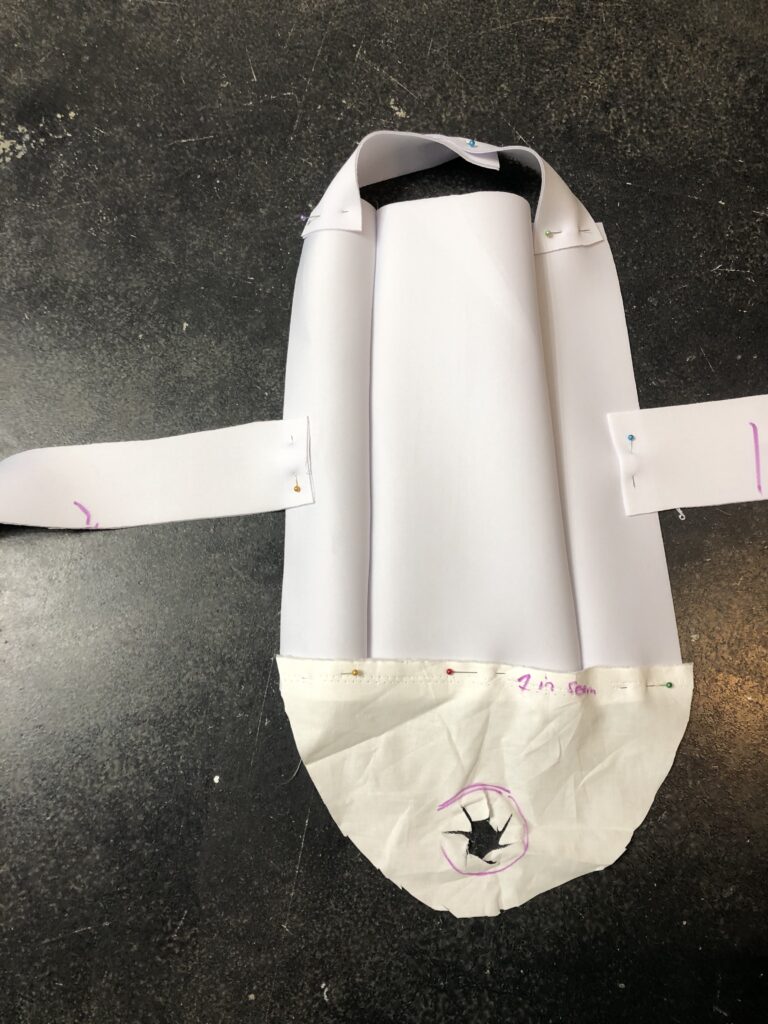
Pattern mock-up 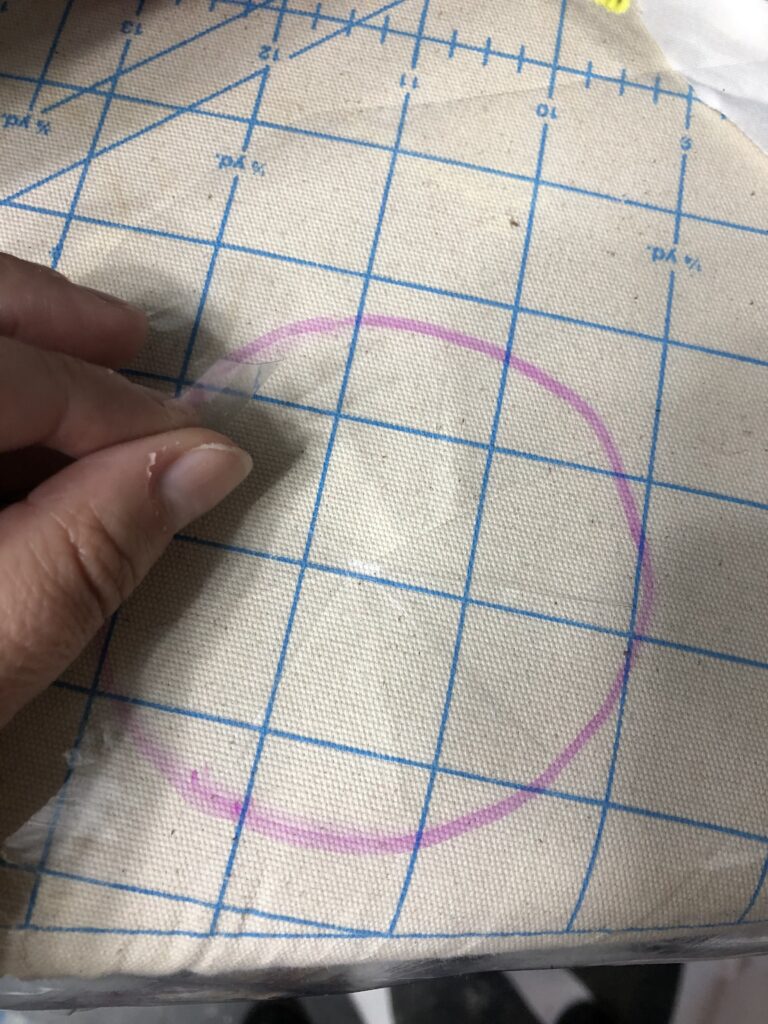
Tracing the tail pattern hole on the plastic 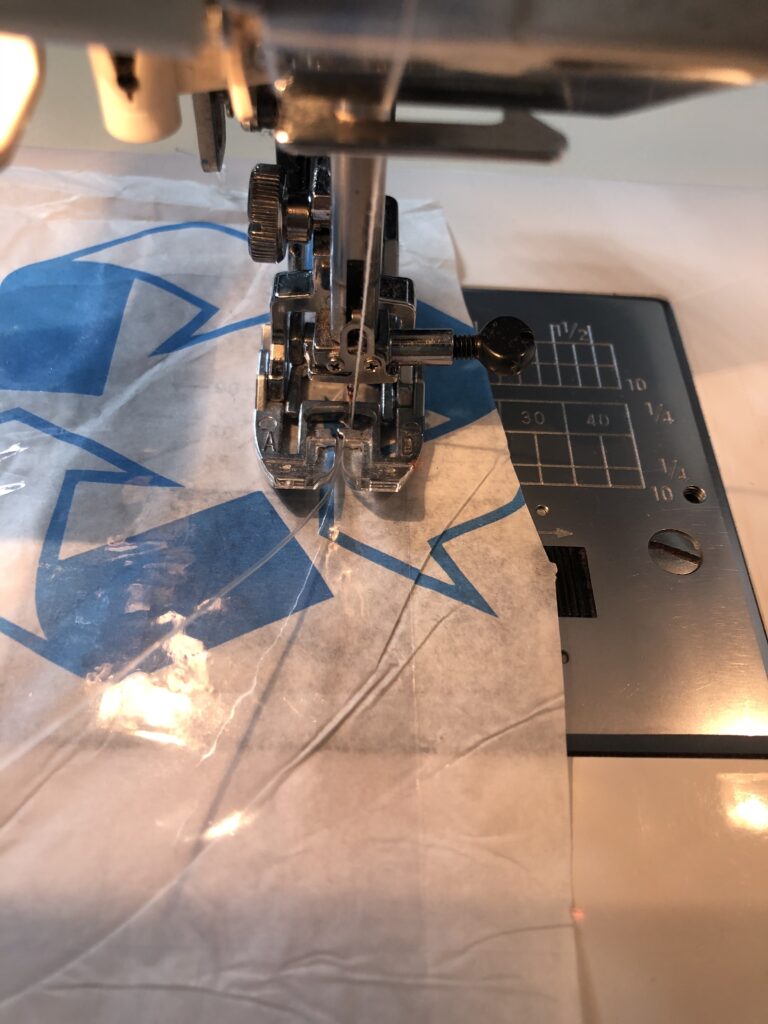
Using finishing line to gather the tail ruffle 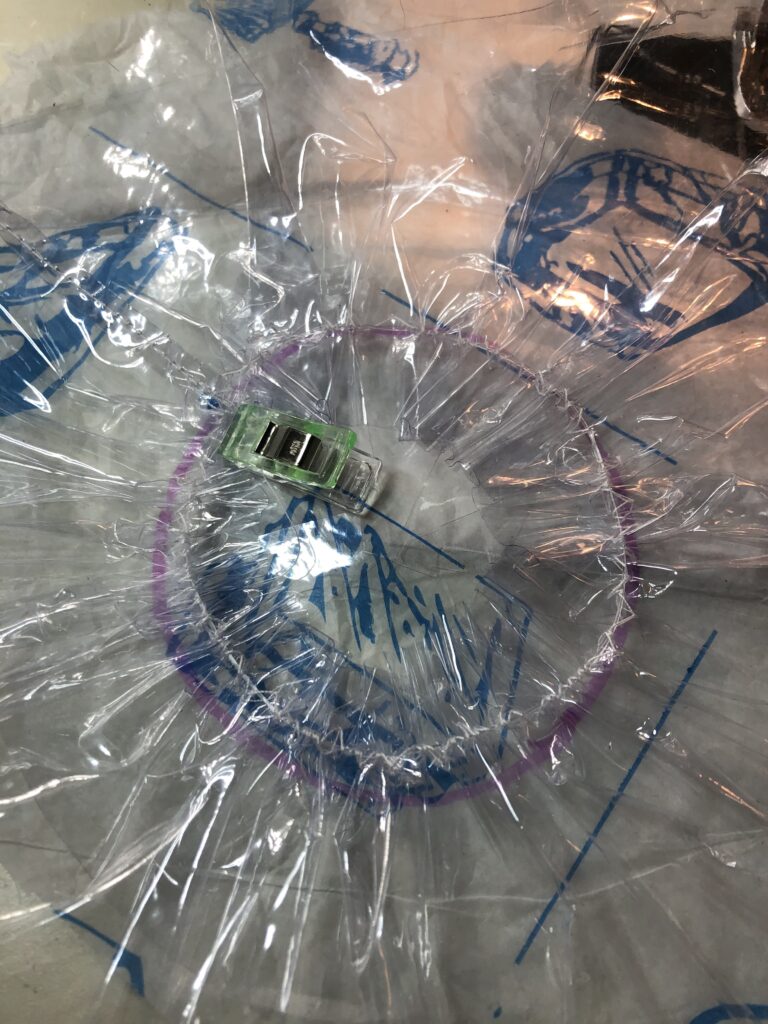
Attaching the ruffle to the base 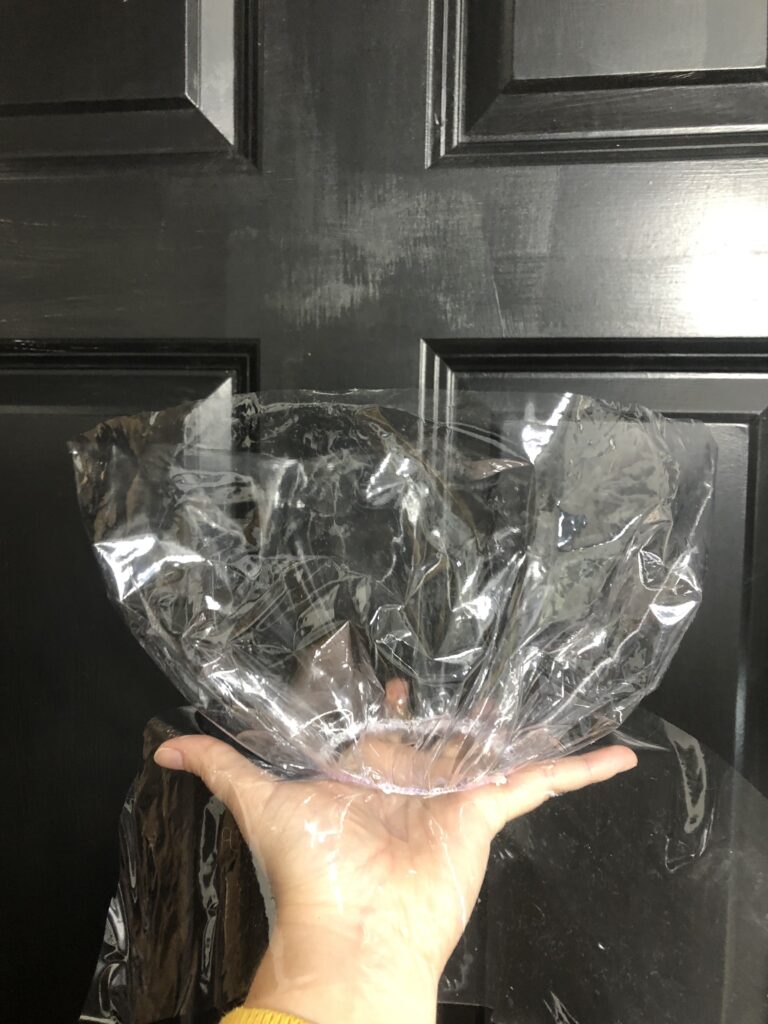
The finished tail section 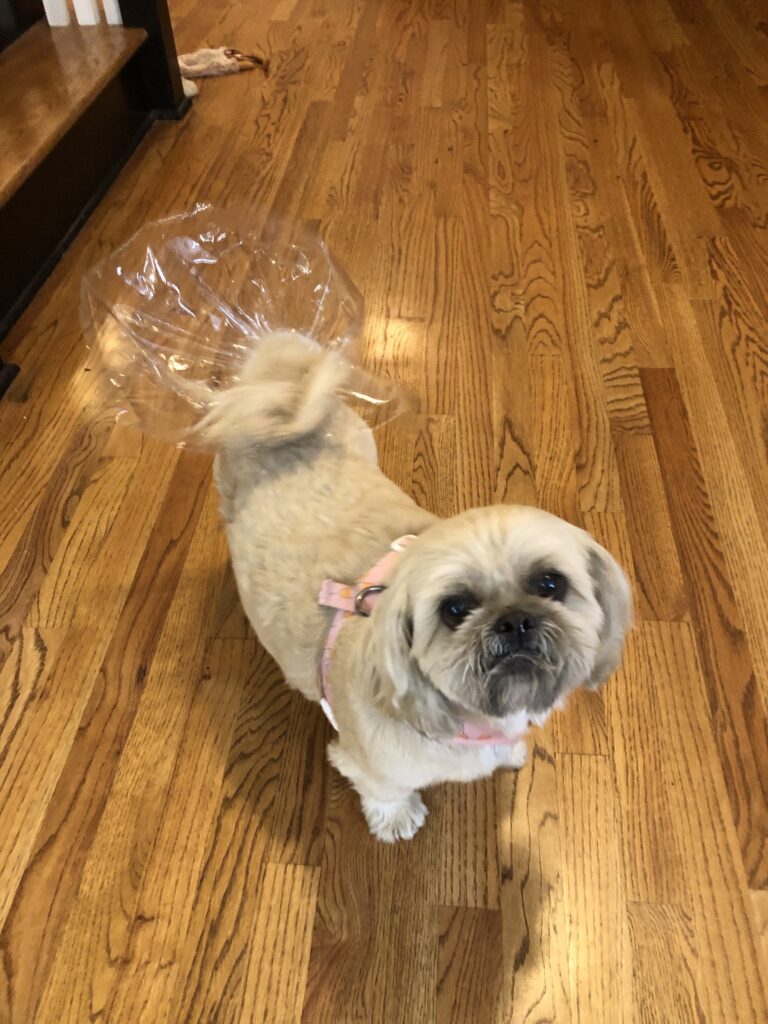
Trying on the tail 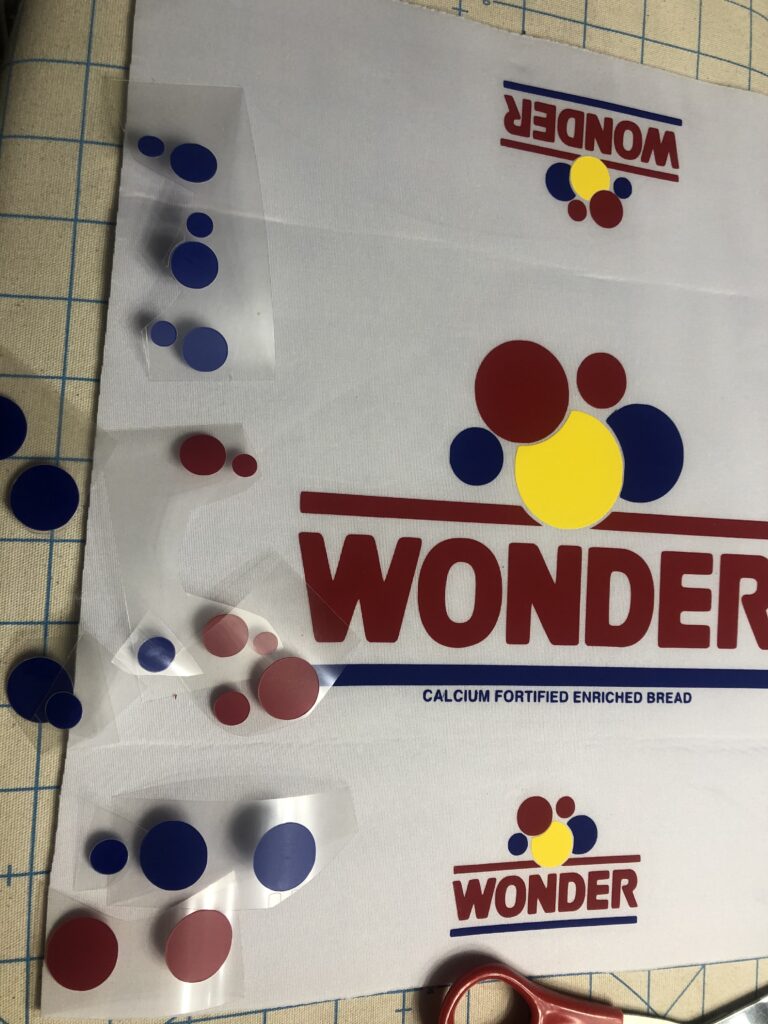
Ironing on the the logos with HTV vinyl. 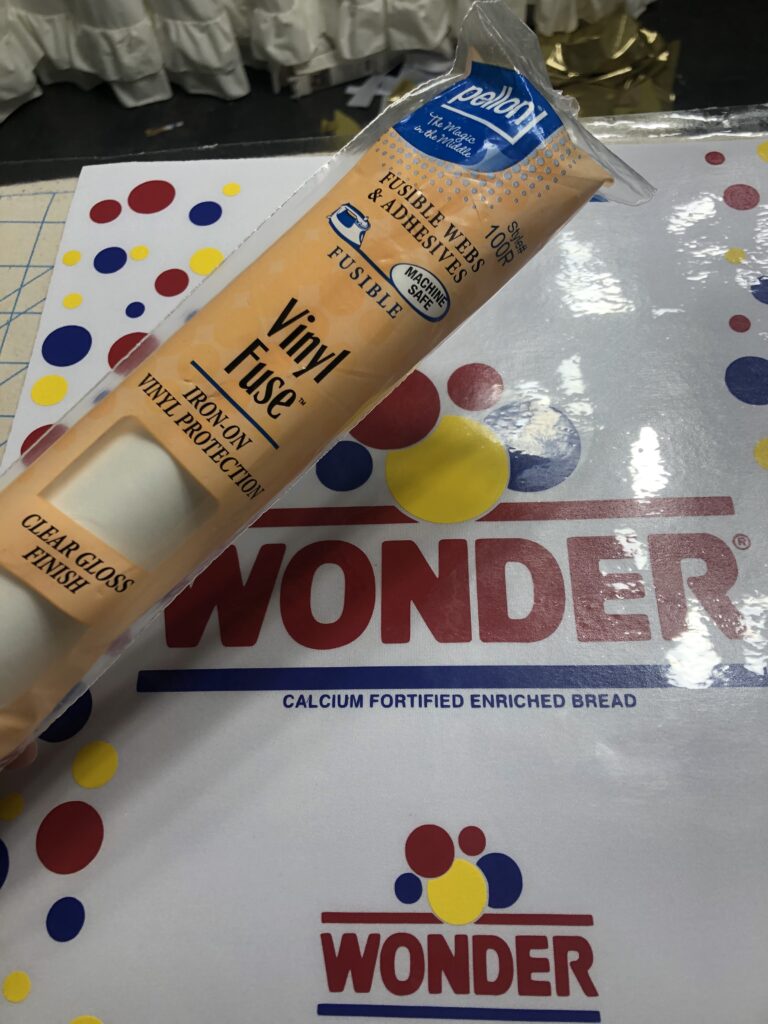
Added vinyl fuse on tope of the outer later for a plastic sheen. 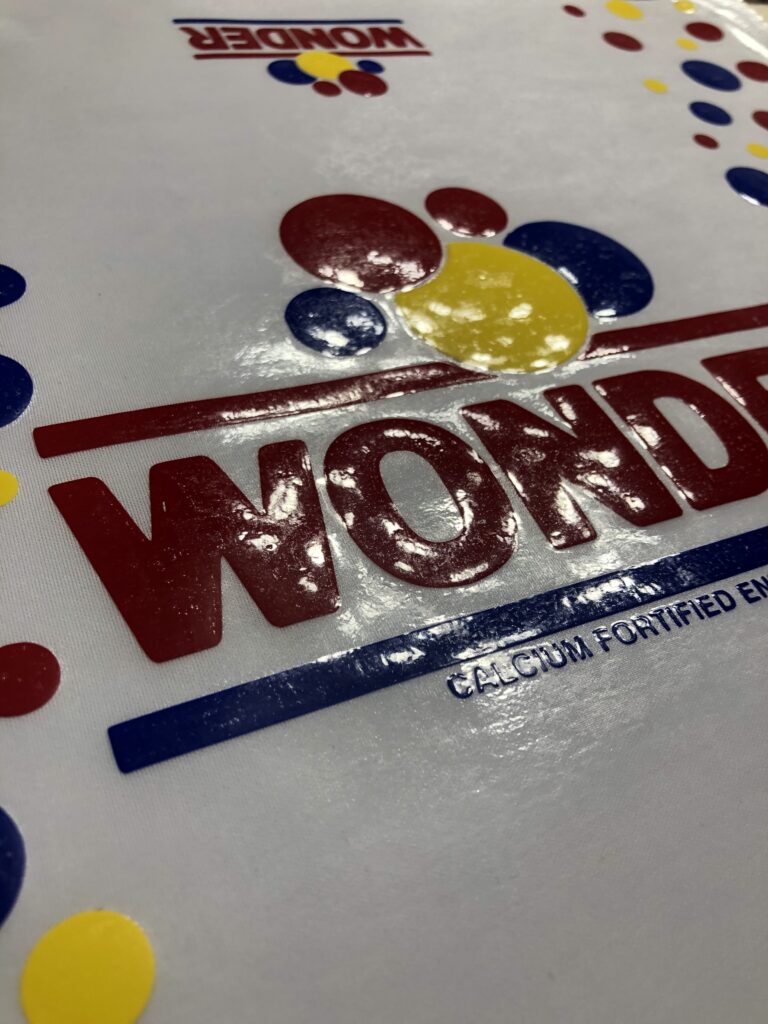
close up of the plastic on top of the logos 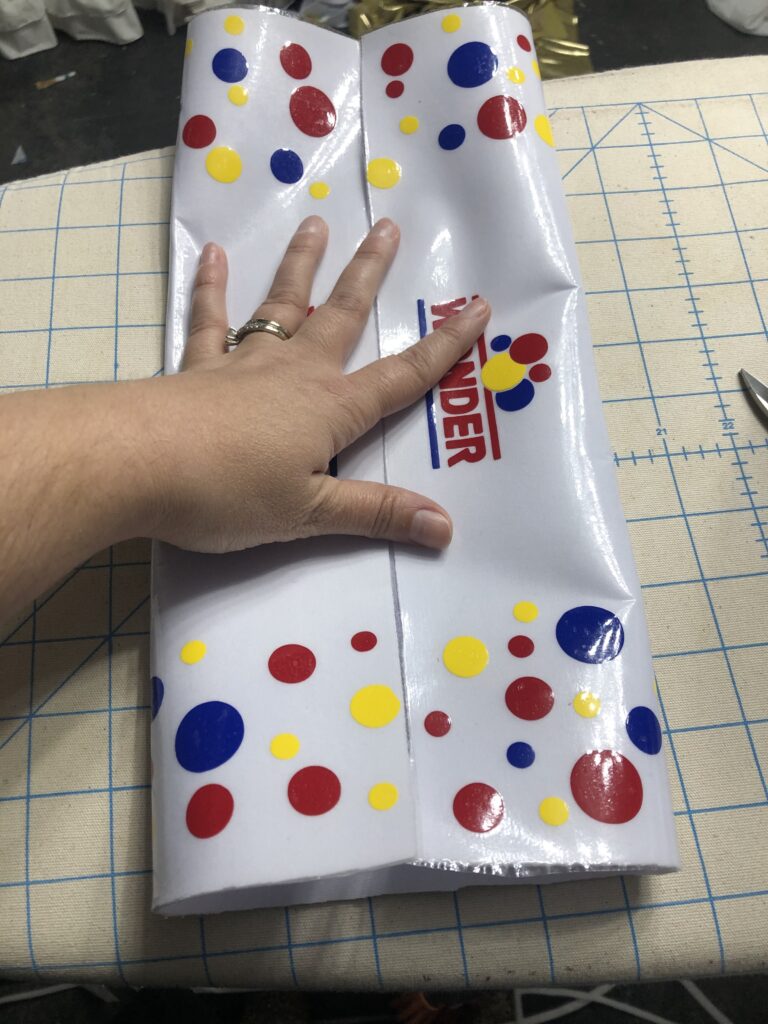
Making a crease for the sides 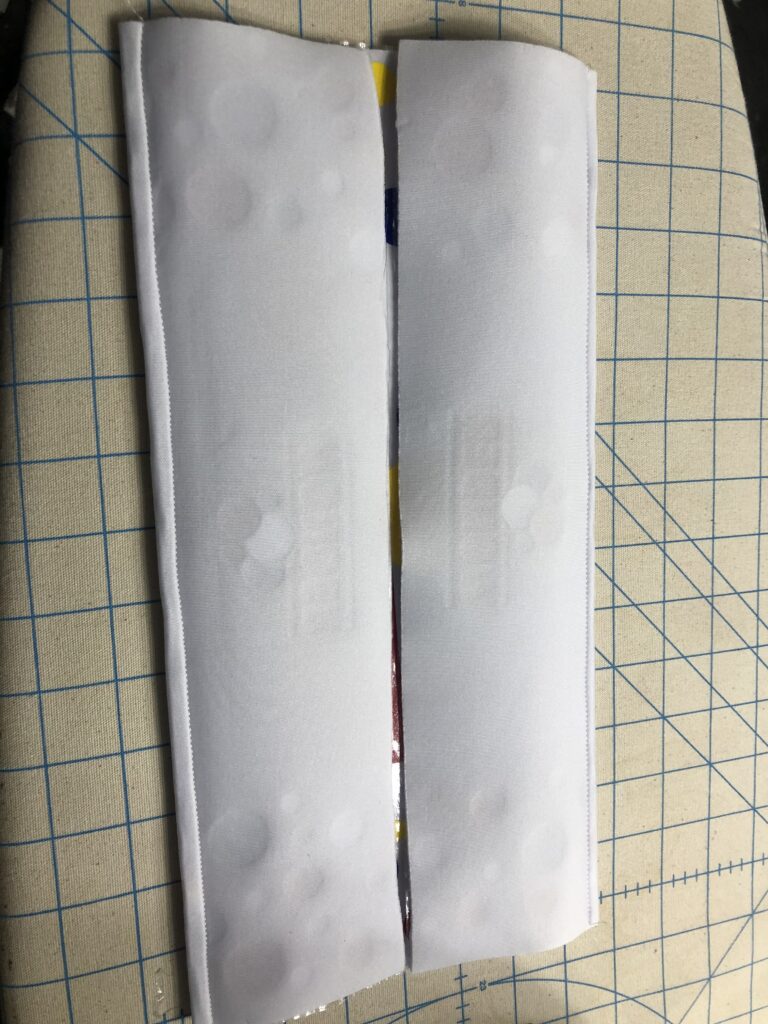
Sewing the crease 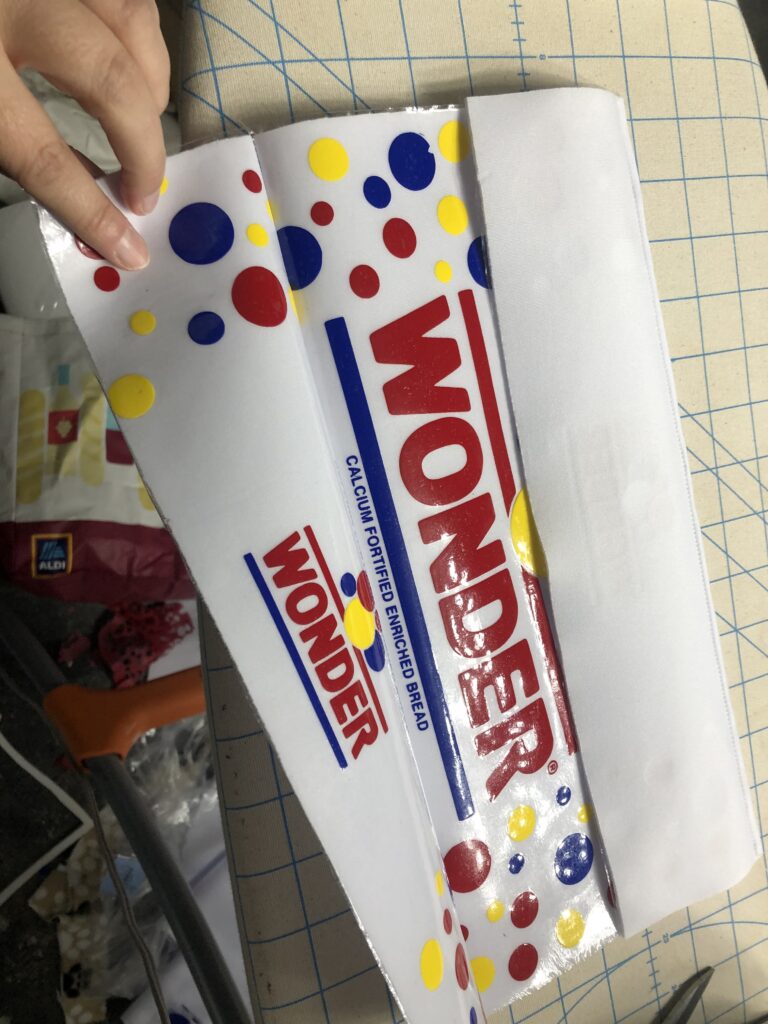
View of the sides 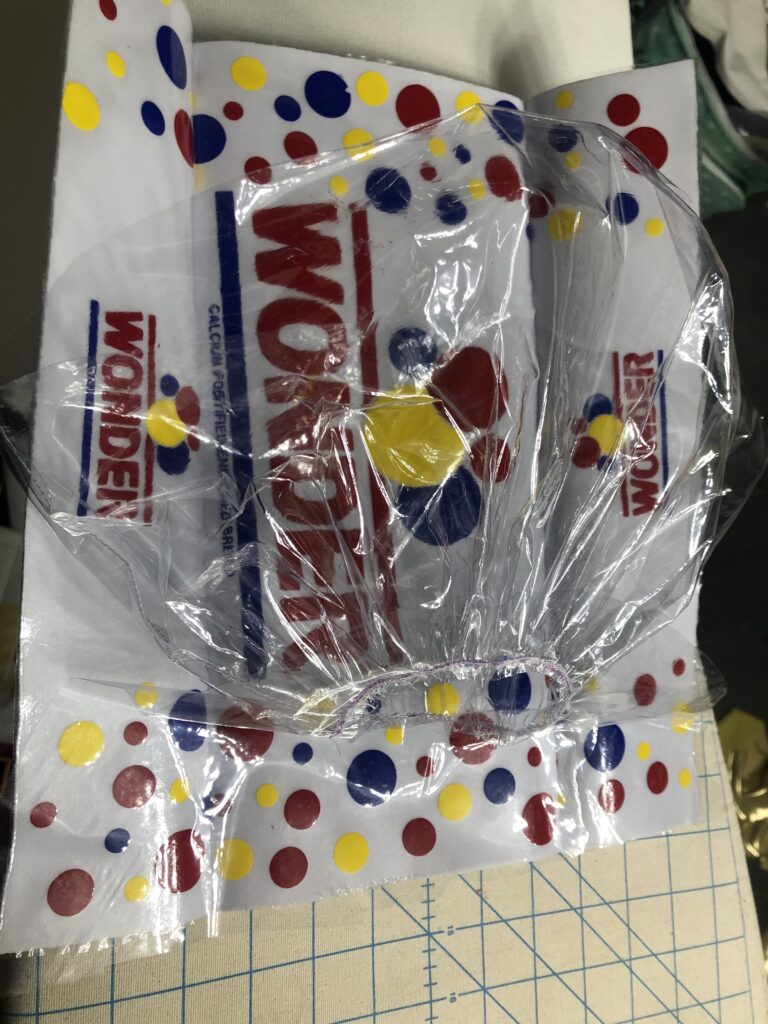
Attaching the tail piece to the completed body 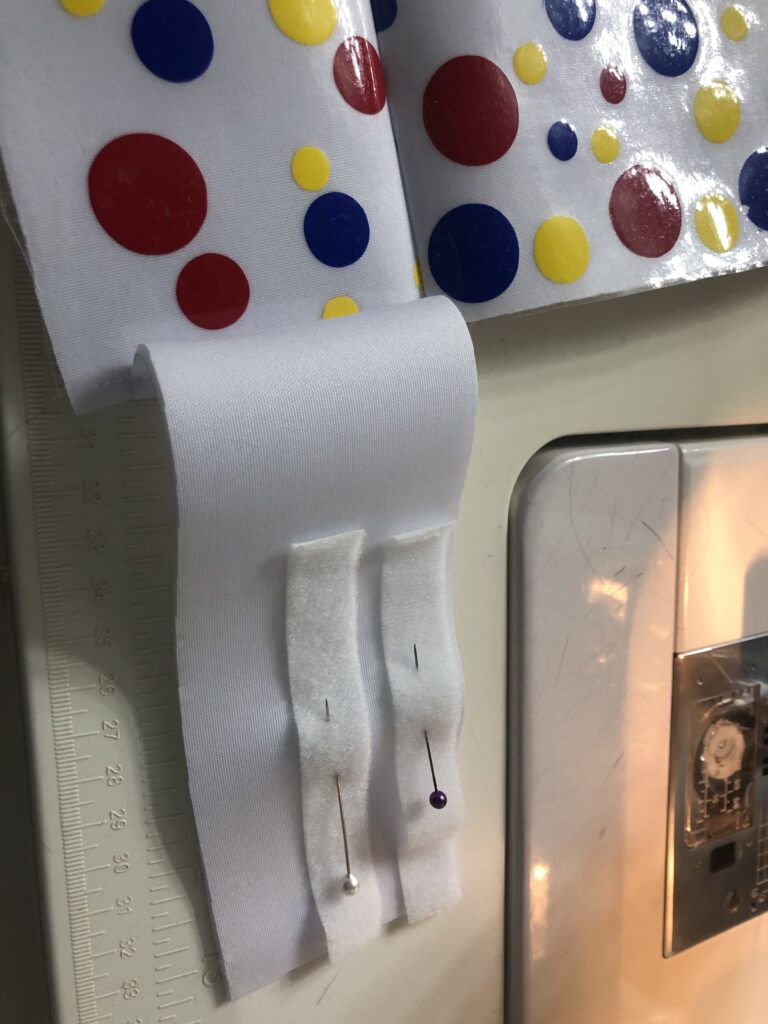
Adding the velcro straps 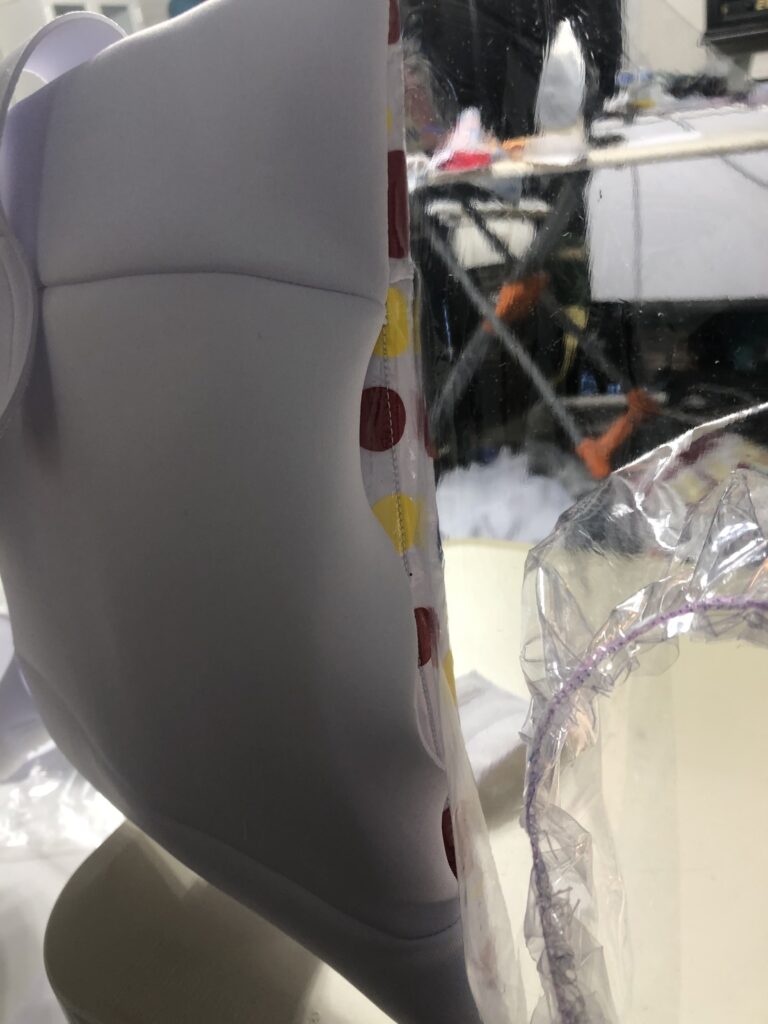
Sew the lining and top layers together leaving a hole for turning. 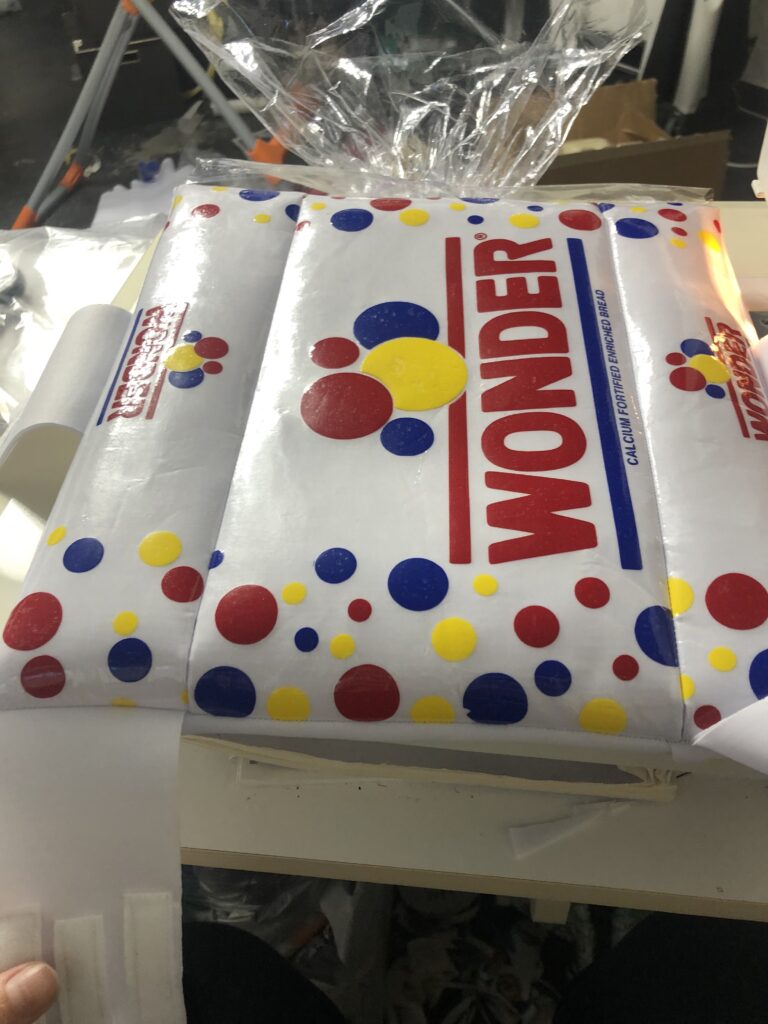
Completed costume!


No Comments