Don’t have photoshop? No problem! I used two free websites to clean up a photo of the dog’s face before loading it in the free Silhouette cutting software. This is helpful when you want to convert a photo to a stencil for manually cutting it out with scissors/Exacto knife or if you have cutting machine like the Silhouette.
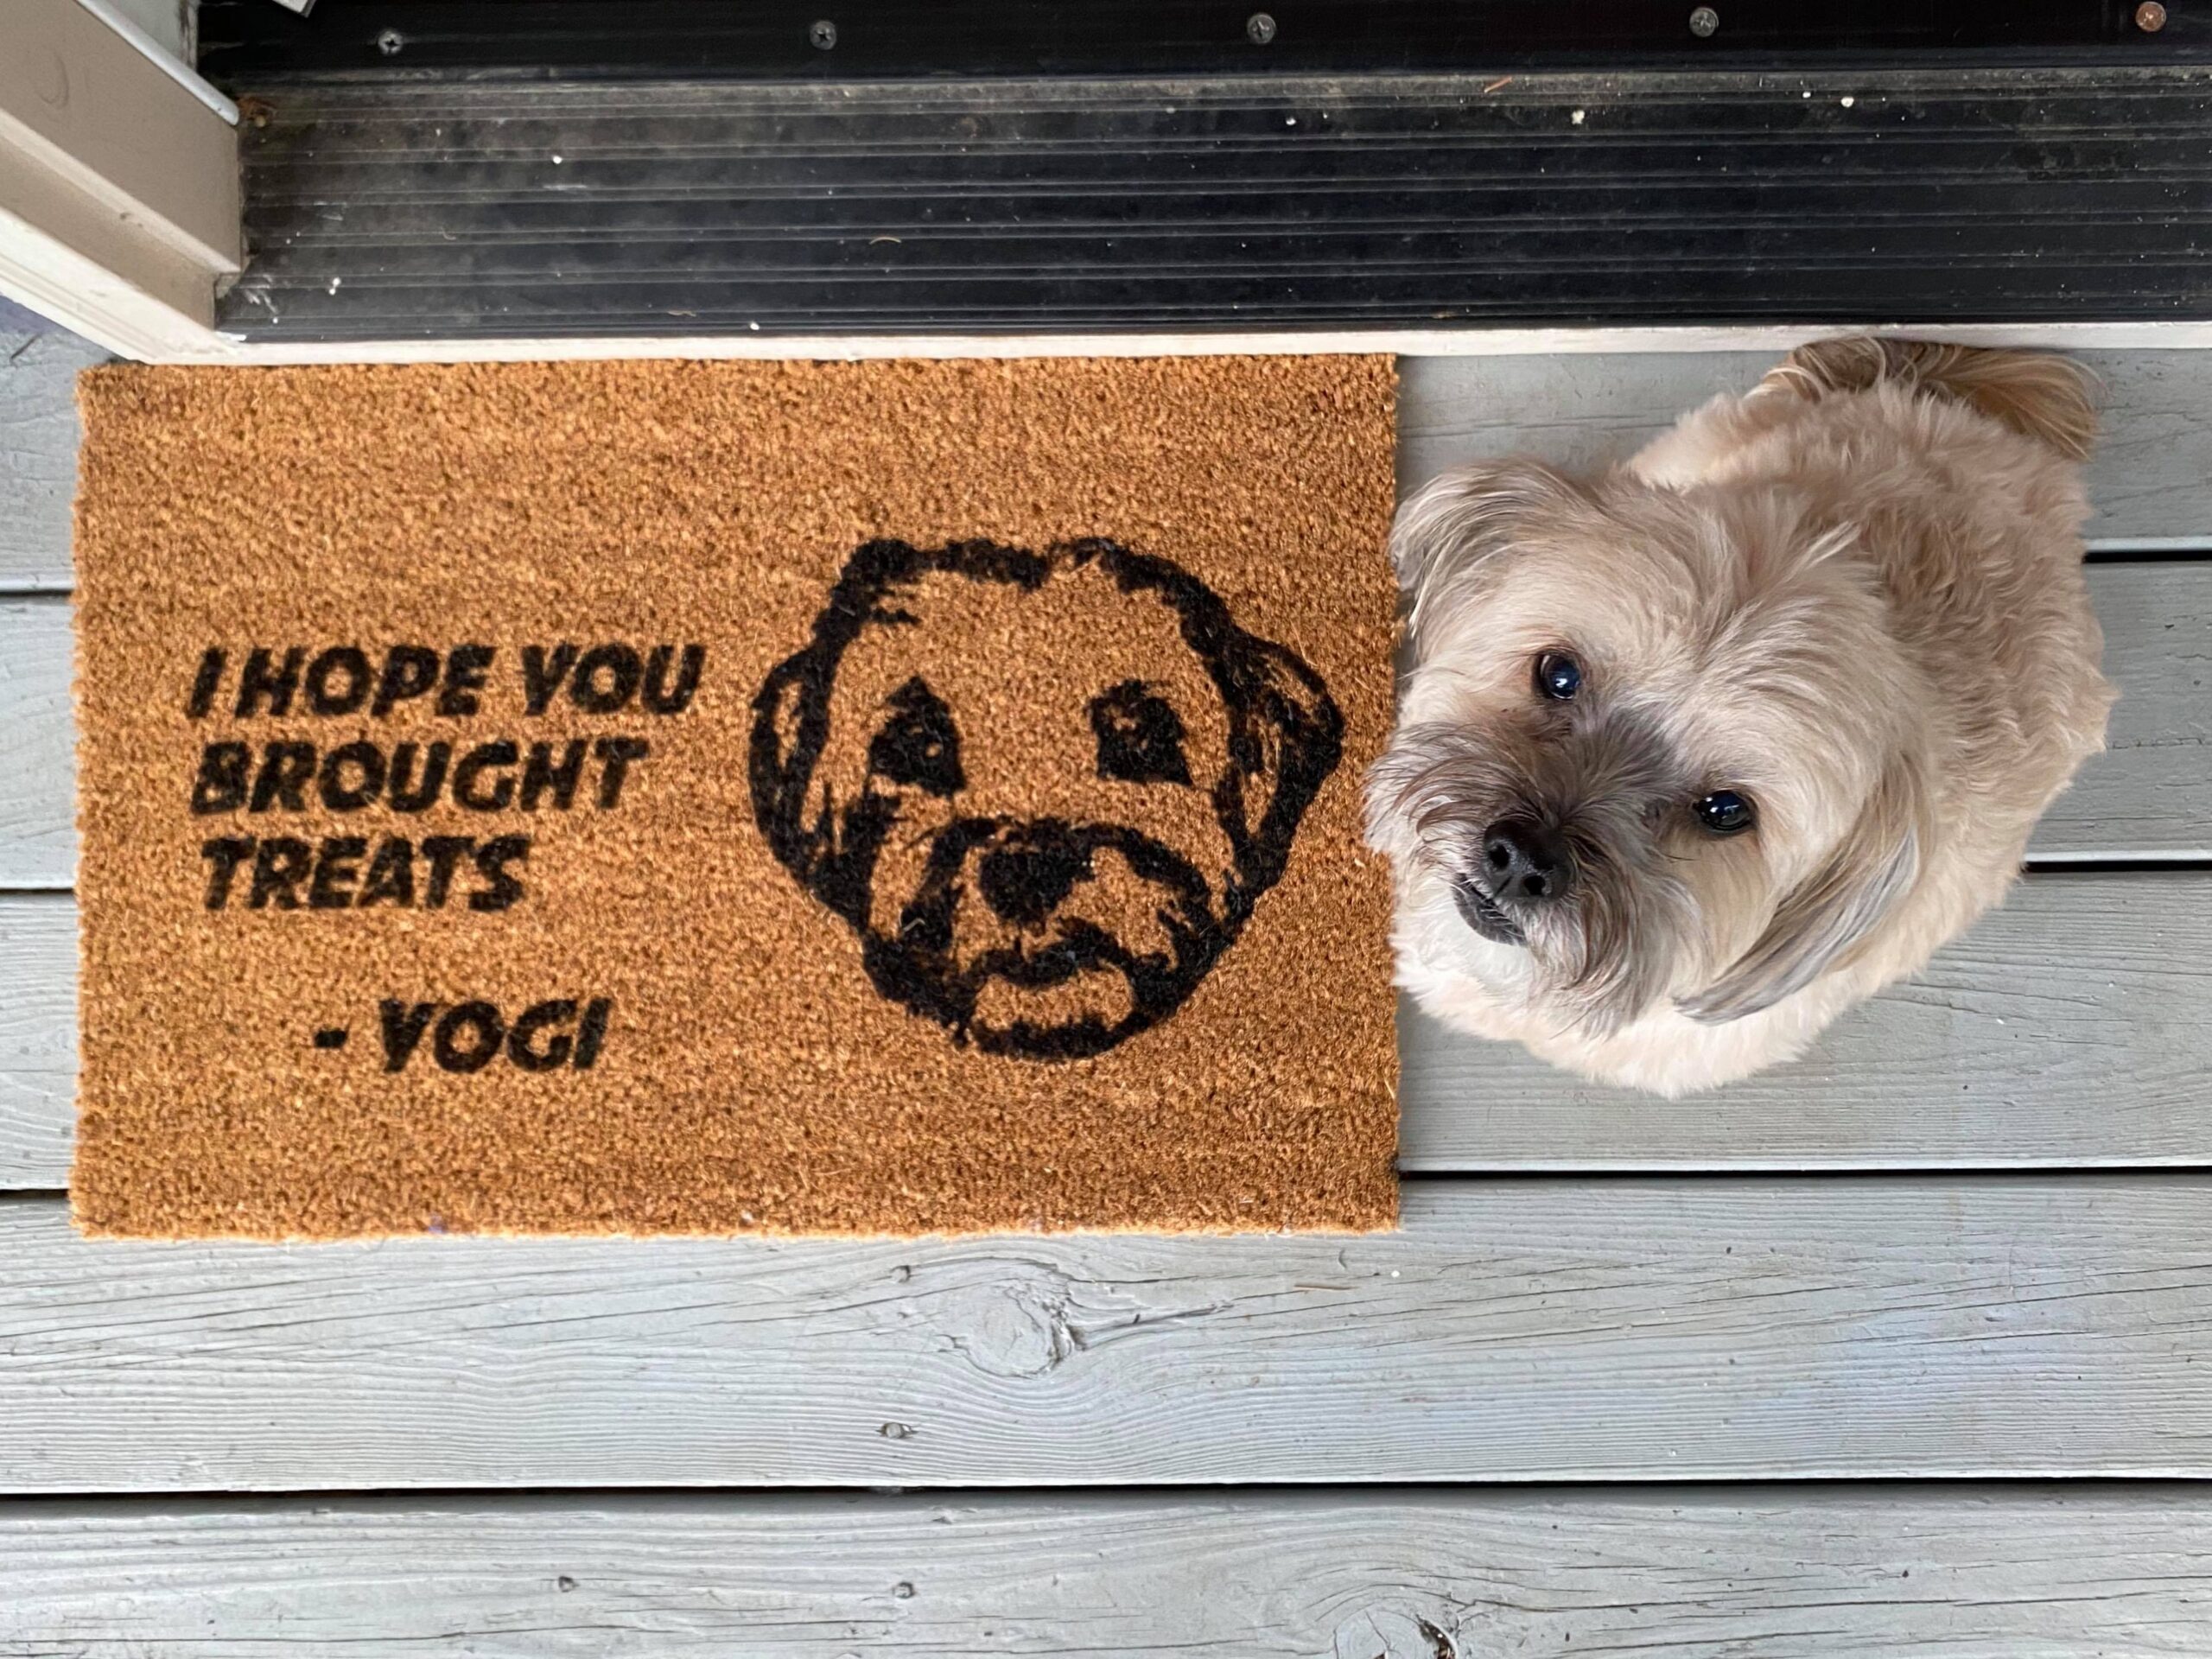
Special thanks to Yogi for the use of his photo for this tutorial. Follow his adorable Instagram here.
Why am I not using the vector/”trace” creator in the cutting machine’s software first? In my experience, by prepping the photo with a few of these techniques, I get a higher quality “trace” when I import into my Silhouette software.
Basic steps to create a pattern for a cutting machine from a photo:
1) Use Remove.bg, a free website to remove the background of your photo.
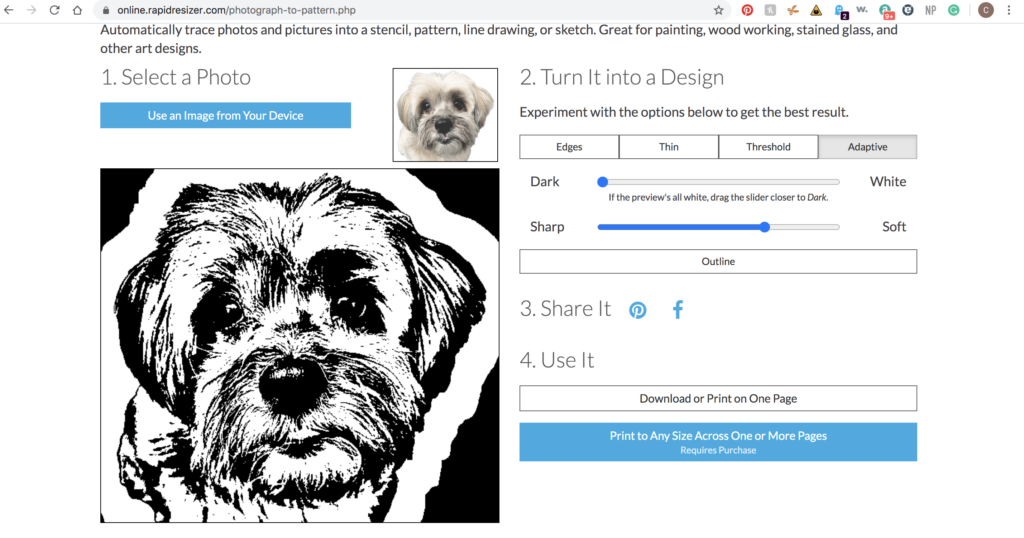
2) Upload the newly removed background photo to this Free Picture Stencil Maker website: https://online.rapidresizer.com/photograph-to-pattern.php
3) Play with the stencil settings (I had the best success with the Adaptive setting) until you are happy with the conversion. Upload the stencil photo into the Silhouette software by going to File-> open.
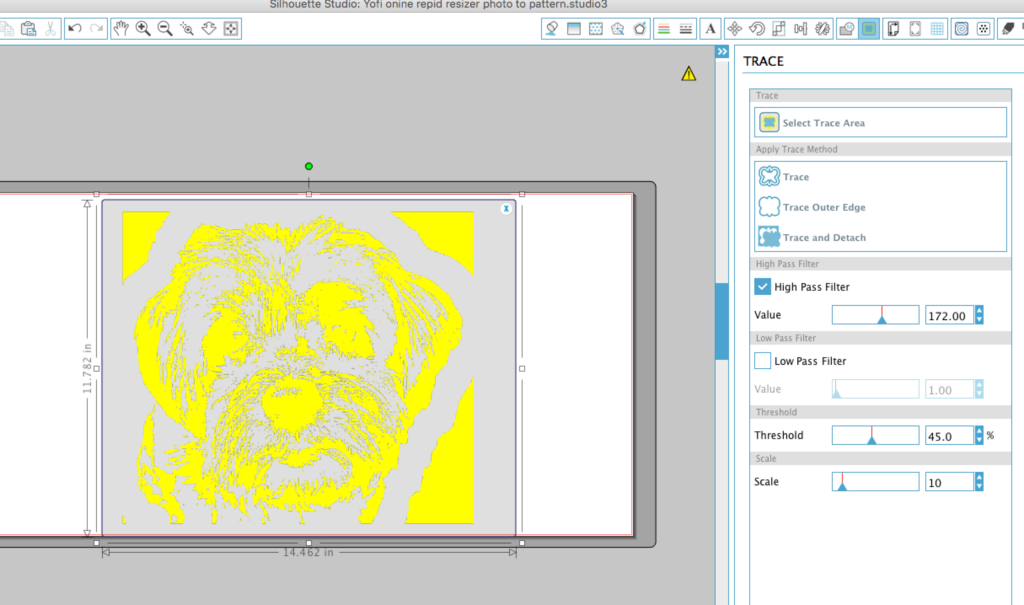
4) Using the “Trace” feature in the free Silhouette software, select the image and use the “High Filter” and “Threshold” settings to cover the image entirely in yellow. Hit “Trace” when you are finished.
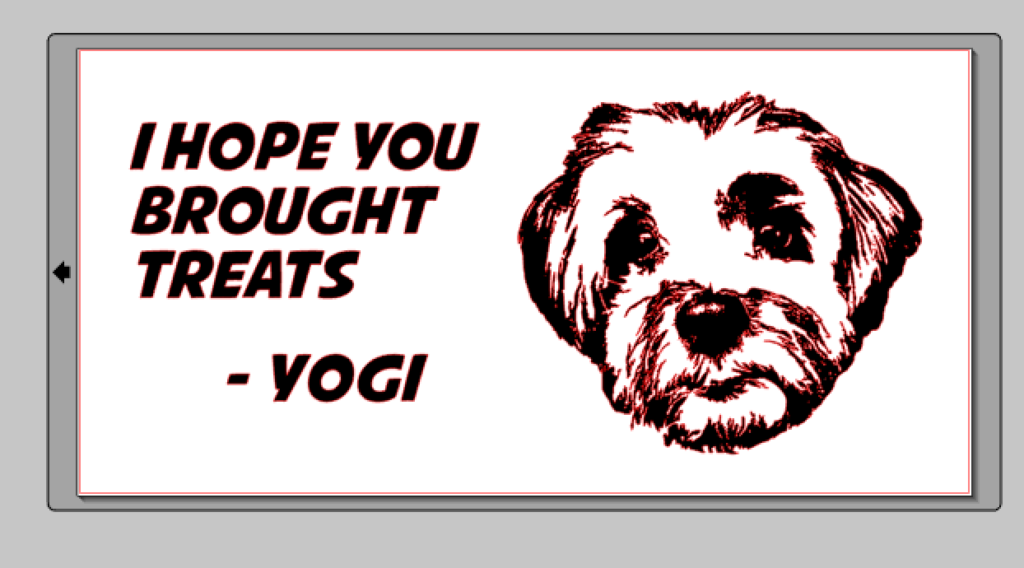
5) The image is now a cuttable vector and ready to be used in your designs and cut! You may need to use the “erase” feature to clean up the stencil to remove tiny details that are difficult to cut.
Visual Steps:

3) Play with the stencil settings (I had the best success with the Adaptive setting) until you are happy with the conversion. Then open this .png file in the Silhouette software
Stencil Tips:
- If you are stenciling by hand with scissors or Exacto knife, you can use thin cardboard or plastic template material if you want to be able to wash and reuse your designs.
- Plastic template material can be cut by your Silhouette or Cricut machine too. Be sure to test cut to find the appropriate cut settings.
- If you need a temporary stencil, I sometimes use leftover sticky-back vinyl pieces from other projects in my cutting machine.
- For a cheaper option, I use contact paper or shelf liner with an adhesive back in my cutting machine. This is an inexpensive alternative (sold at Dollar Tree!) to adhesive vinyl if you only need to use the stencil for a single project.
Want to see how I used this technique to create custom door mats? Click here.


No Comments